

Alright, we have another cookie recipe for you to try! (Clearly we love cookies around here, if you can’t tell!) This one is ICEBOX cookies — but, not just any old icebox cookies — these are themed after Mickey & friends!
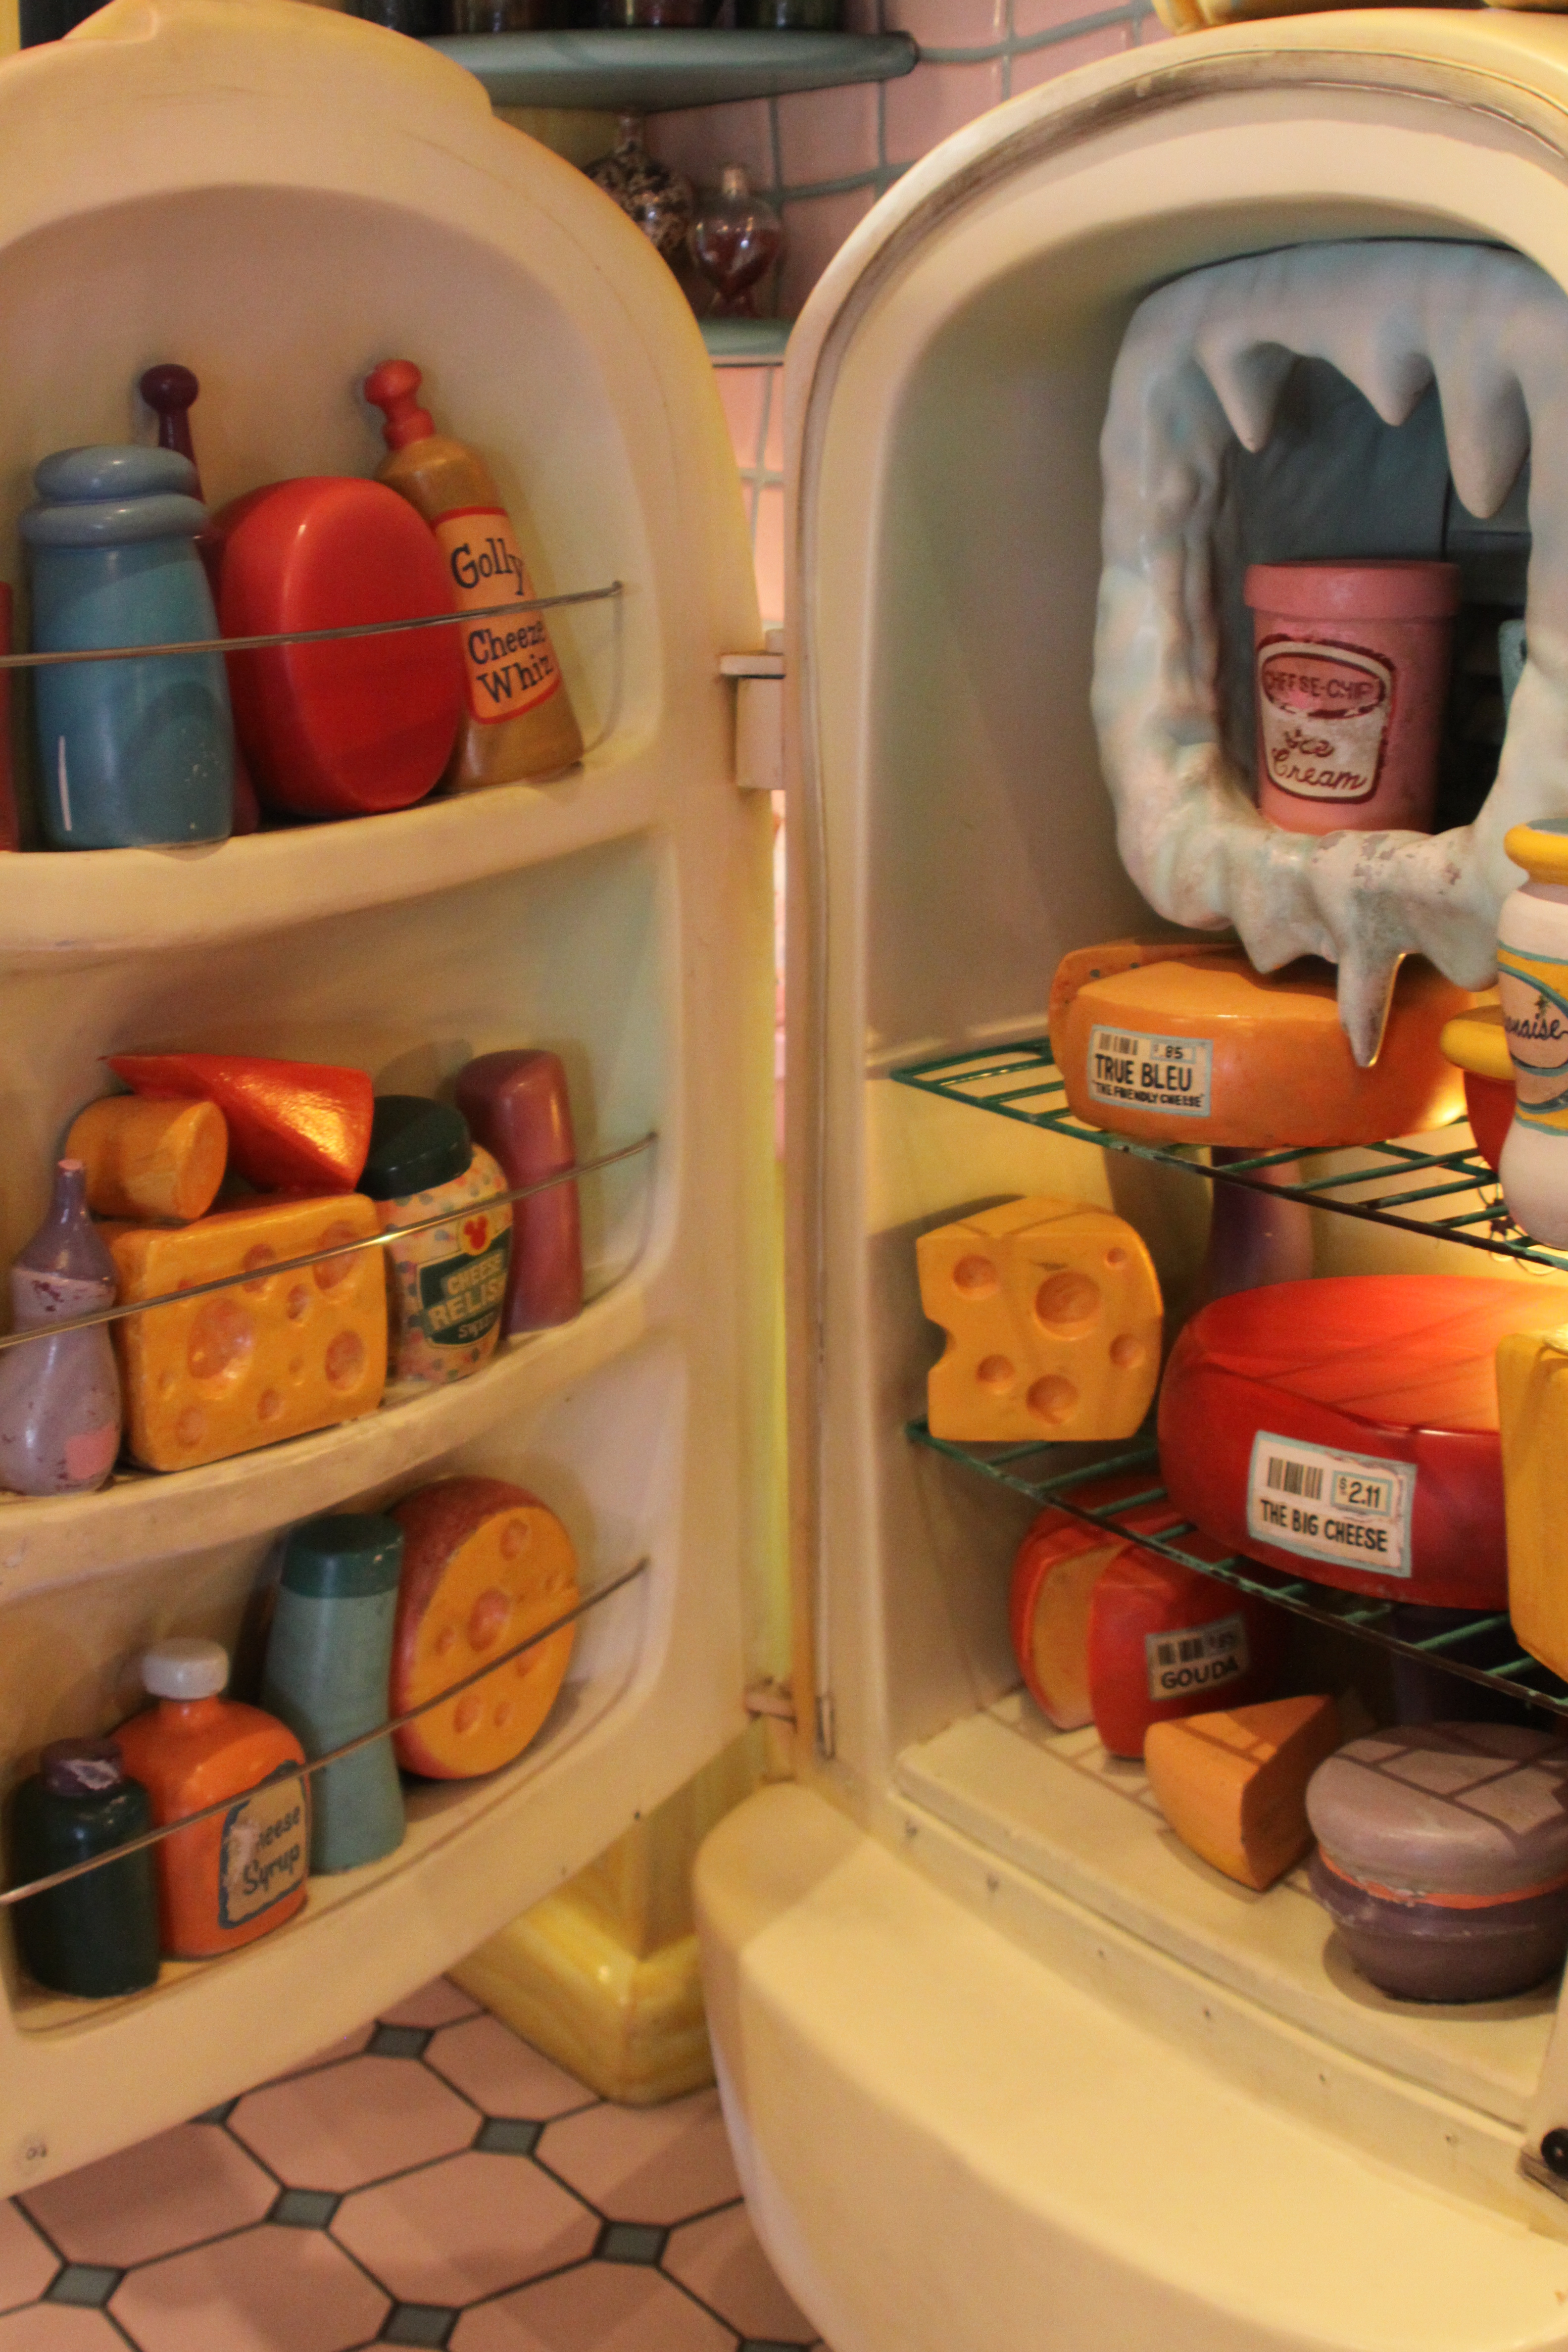
In Minnie’s icebox
If you’re not familiar with Icebox cookies, you’re not alone! Icebox cookies became popular in the 1930s when people began to make cookie dough and keep it in their icebox to bake later – hence the phrase icebox cookies! Basically, they’re the O.G. break-and-bake cookies that you see at the store today!
Decades later, bakers everywhere are still enjoying icebox cookies — but they’ve certainly gotten more creative over the years! Cue the adorable Mickey & Friends cookies from Disney Family!

Mickey & Friends Icebox Cookies!
This recipe calls for a little creativity and artistic skills on the decorating front, but the nice thing is these cookies can be stored in your fridge and baked whenever your sweet tooth starts talking! The recipe makes 2 to 7-inch character cookie logs. Each log makes about 30 cookies.
Ingredients
- 2 cups unsalted butter, at room temperature
- 1 egg + 2 yolks, room temperature
- 6 cups all-purpose flour, sifted
- Gel or powder food colors, like black cocoa or matcha
- 1 egg white
- 2 1/2 cups powdered sugar, sifted
- 2 tsp vanilla or almond extract
- 1 tsp fine salt
- Bench flour, if needed
- 1 tsp water
- 1/4 cup royal icing, tinted in the color of the character you are making
- 2 Tbsp pink fondant, for Daisy
- 2 Tbsp red fondant, for Donald
- Chocolate chips or dots, for Goofy
- Rolling pin
- Small dot piping tips
- 2 12×1/2-inch square dowels
- Piping bags
- Mini flower cookie cutter (optional)
Directions
Step 1: In a stand mixer, cream the butter together with the powdered sugar. Add in the whole egg, egg yolks, and vanilla or almond extract. In a large bowl, mix together the flour and salt. On low, gradually add the flour mixture to the creamed butter mixture. Scrape the sides of the bowl down periodically so that everything gets incorporated. Wrap the dough in plastic wrap, and place in the fridge for at least 2 hours until chilled.
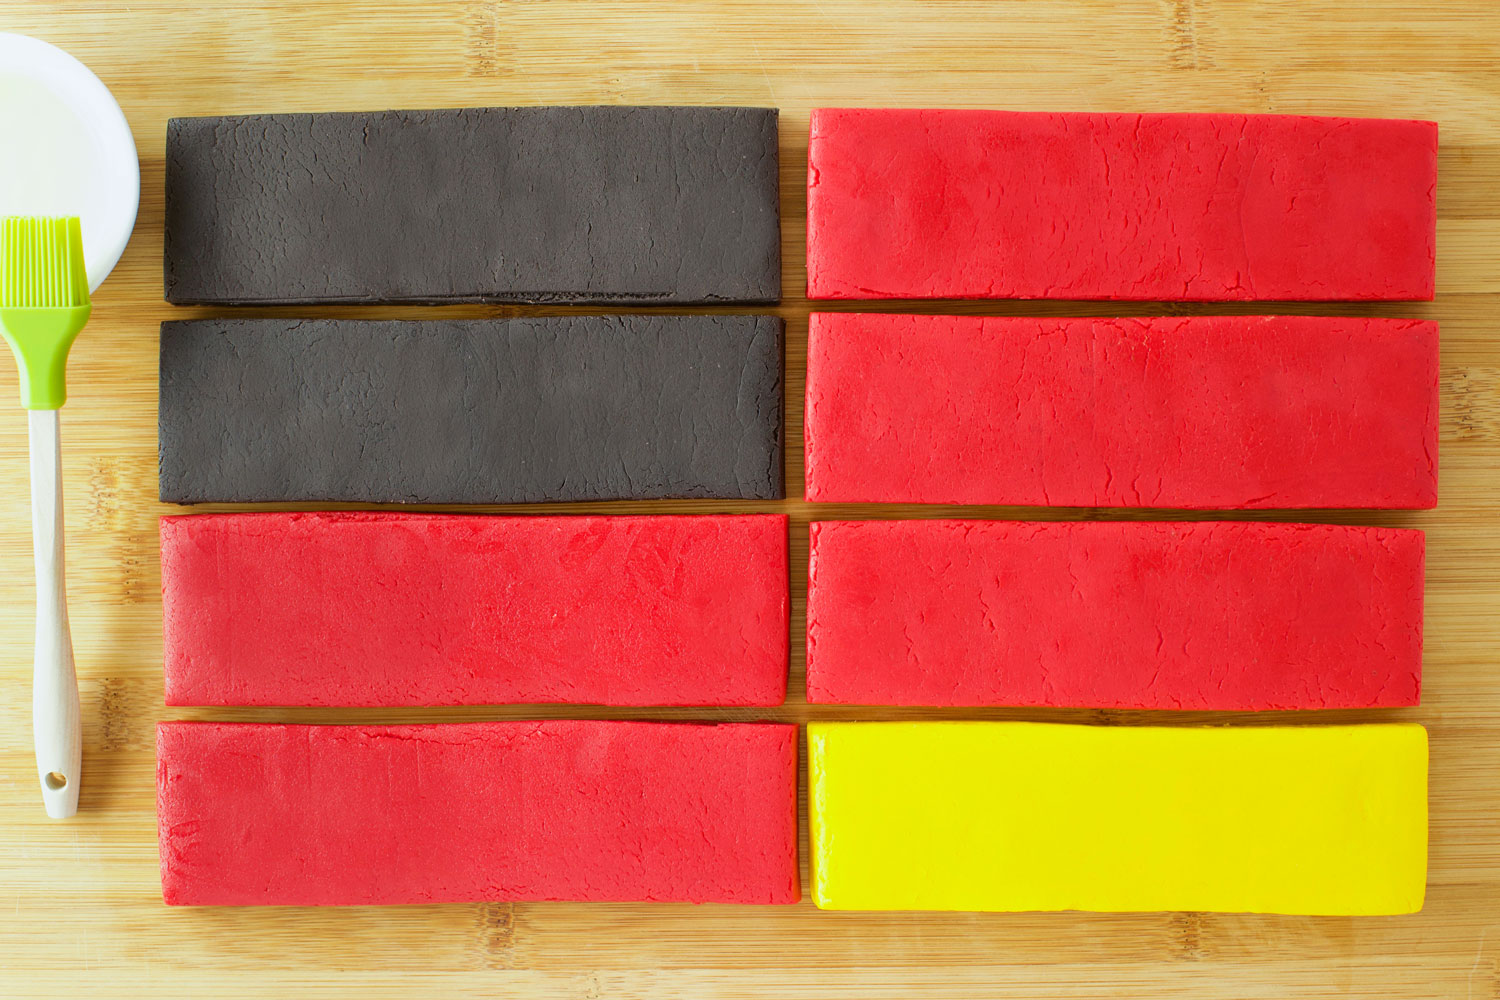
Step 2: Divide the dough into eight equal pieces. To make one strip of dough that is 7 inches long, 2 inches wide, and ½ an inch thick, you will need approximately ¾ cup of prepared cookie dough, which is one-eighths of this cookie dough recipe. According to the colors needed for one character, knead food coloring into the ¾ cup of dough until it is even throughout. Roll this dough into a 5-inch flattened log. Use a rolling pin to roll out the dough in between two square dowels, spaced 3 inches apart. If the dough sticks, use bench flour. Using a ruler and a sharp knife, trim the dough into a 7 x 2-inch rectangle.
Step 3: For a Mickey-inspired cookie dough log, you will need two black strips of dough and two red strips of dough. For a Minnie-inspired cookie dough log, you will need three red strips of dough and one yellow strip of dough. Each strip should be 7 inches long, x2 inches wide, and ½ an inch thick. Use a mixture of egg white mixed with water to “glue” four strips of dough together to make one character cookie log.
©Disney Family
Step 4: For a Donald Duck-inspired cookie dough log, you will need three blue strips of dough and one white strip of dough. For a Daisy Duck-inspired cookie dough log, you will need three pink strips of dough and one white strip of dough. Each strip should be 7 inches long, 2 inches wide, and ½ an inch thick. Use a mixture of egg white mixed with water to “glue” four strips of dough together to make one character cookie log.

©Disney Family
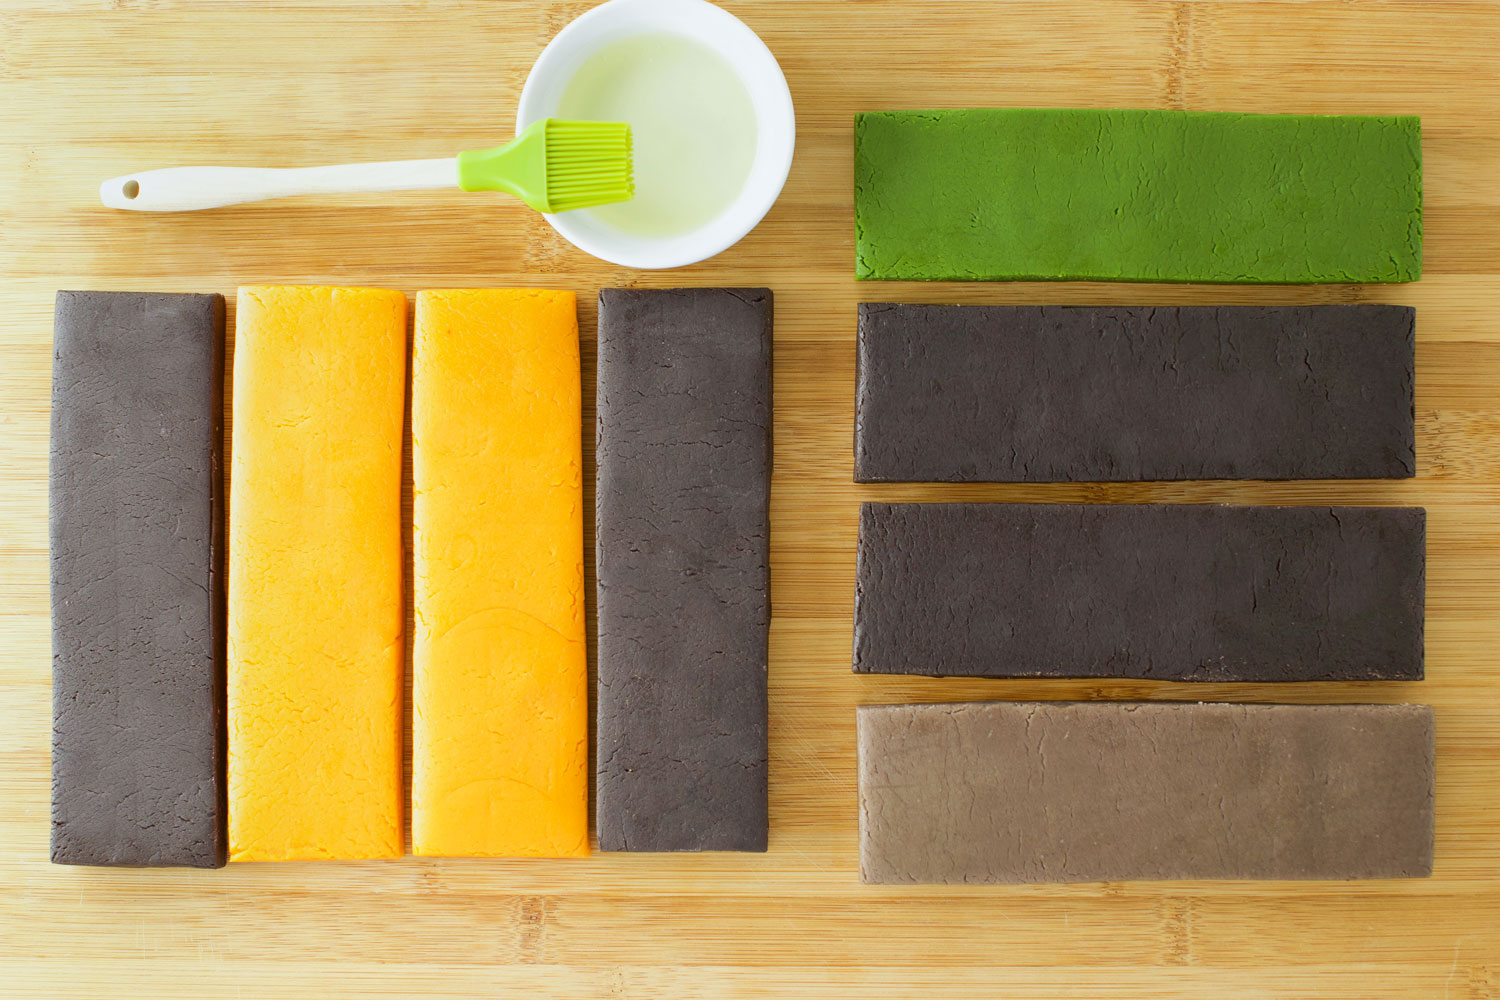
Step 5: For a Goofy-inspired cookie dough log, you will need one green strip of dough, two black strips of dough, and one gray strip of dough. For a Pluto-inspired cookie dough log, you will need two black strips of dough and two orange strips of dough. Each strip should be 7 inches long, 2 inches wide, and ½ an inch thick. Use a mixture of egg white mixed with water to “glue” four strips of dough together to make one character cookie log.
©Disney Family
Step 6: The cookie dough logs for these Mickey & Friends Icebox Cookies can be stored in the fridge for up to 5 days, or in the freezer for up to 12 months. For best results, tightly wrap the dough logs with plastic wrap and place in an airtight container.

©Disney Family
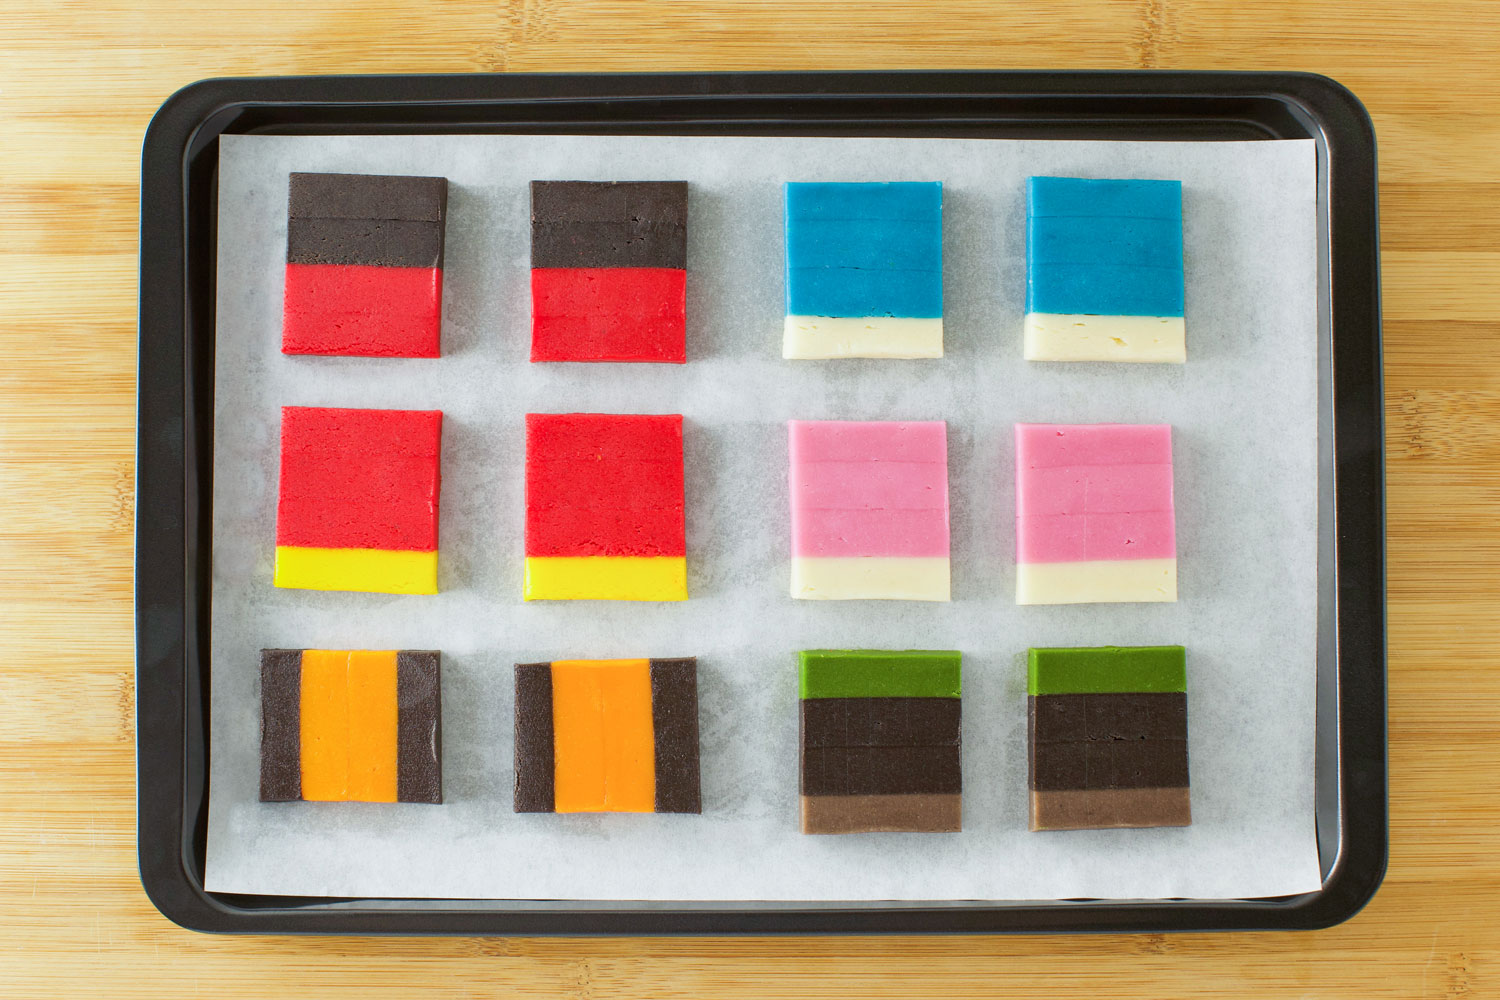
Step 7: When it’s time to bake, preheat the oven to 350˚F. Take a cookie log out of the fridge. Trim the uneven sides of the log with a chef’s knife. Slice the dough into ¼-inch thick slices.
Step 8: Place the cookies on a parchment-lined baking sheet. Bake for 8-10 minutes, until slightly puffed but not browned.
©Disney Family
Step 9: After the cookies have cooled completely, decorate them with tinted royal icing fitted into piping bags. For Mickey, pipe two yellow royal icing dots. For Minnie, pipe many white royal icing mini dots. For Donald, pipe white royal icing buttons & attach a bowtie cut from red fondant. For Daisy, pipe turquoise and lavender royal icing lines. Attach a bow and a daisy made from pink fondant. For Goofy, use tan royal icing to pipe his vest, and attach a chocolate dot or chip for his button. For Pluto, pipe a red royal icing collar.
Step 10: Enjoy Mickey & Friends Icebox Cookies whenever you fancy a sweet treat!

©Disney Family
Voilà! Fun cookies for your whole family to enjoy!
Check out 10 Disney Cookies Recipes for You to Try at Home!
Join the DFB Newsletter to get all the breaking news right in your inbox! Click here to Subscribe!
Do you plan to make these cookies? Let us know what you think in the comments down below!
The post Disney Recipe: This Spin on Classic Icebox Cookies Features Mickey! first appeared on the disney food blog.